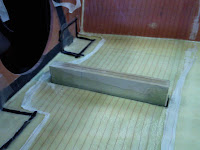
Just before we took the deck off of the frames we got underneath and put some marks onto the foam where the deckline is so that when we took the deck off of the temporary frames we know where to cut it off (remember when we made the deck temporary frames we made them 50mm bigger so that we would have an area to apply the vacuum tape). Once we flipp the deck over we took a jig saw and cut down that line that we drew on using a fair batten. We changed the angle on the jigsaw from a large bevel aft tapering to nearly plumb forward near the bow to allow for the shape of the topsides on the hull to fit as nicely as possible. Unfortunately, we had to put the deck on and take it off several more times than we would have wanted due to slight overages in the deck foam, but ideally, we should be able to get that line and then trim it off in one go. Another issue that arose when we were attaching the deck was the centercase. We have already installed in to the hull but had not yet cut out a spot on the hull. It is actually quite a tricky cut as well because the forward face of the centercase is plumb the the aft face is raked aft. We trimmed the hole on the deck slightly larger on the aft side while having it nearly dead on forward (allowing for epoxy of course). Once we had determined that the deck and hull fit together nicely we made up the resins. On the flanges that we built on the girder, transom and topside we put down ample epoxy in order to properly squash bond the deck and hull together. On the station 11 and collision bulkheads we actually used a nail that we bent at a right angle and installed it into a power drill. This allowed us to easily router out the foam while the leaving the fiberglass that had already hardened. We then filled the gap in with enough rubberized epoxy (strong resin that bonds fiberglass to fiberglass extremely well, no need to glass tape the joint).


No comments:
Post a Comment