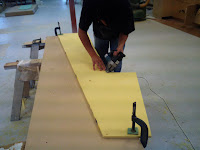


We stared on the deck by making the cockpit sole. This is main area of the deck where you would stand/sit. The foam used for the entire deck we got extremely cheap, mainly because most of the foam had defects in it. These defects were not extremely damaging but we had to be careful when selecting the pieces that we were going to use. The cockpit sole pieces had little holes throughout, almost like it was perforated. Because we are going to be vacuum sealing the deck we needed to preglass the underside of the cockpit sole before it was put into situation. We built the cockpit sides in nearly the exact same fashion that we built the topsides on the deck, by using a scribe. None of the pieces that we used throughout the entire deck were ever big enough so one of the main problems that we had to solve was to figure out where we would put all of the joins in the different pieces and do this in the most economical way. After we glued down the cockpit side we started on the foredeck. This part was tricky because there were many different ways that we could work out how to put the foam down and we were running short on pieces of foam that we had left. We cut many different shapes out of some cardboard and moved them around on the deck many different times in order to find the best fit. After that the side deck just fit right in. I would say that putting the foam on the deck was very similar to strip planking the hull, only after we had the first planks down. The deck did not really require much analytical thinking and we were able to have the majority done in 4 days. The cabin top or blister was slightly tricky but not overly challenging. The shape required us to makes strips of foam that were tapered and beveled. The trickiest part of this was figuring out a way to hold the foam down in place without putting nails in the foam.


No comments:
Post a Comment