Sunday, November 14, 2010

Garboard and Strake Size


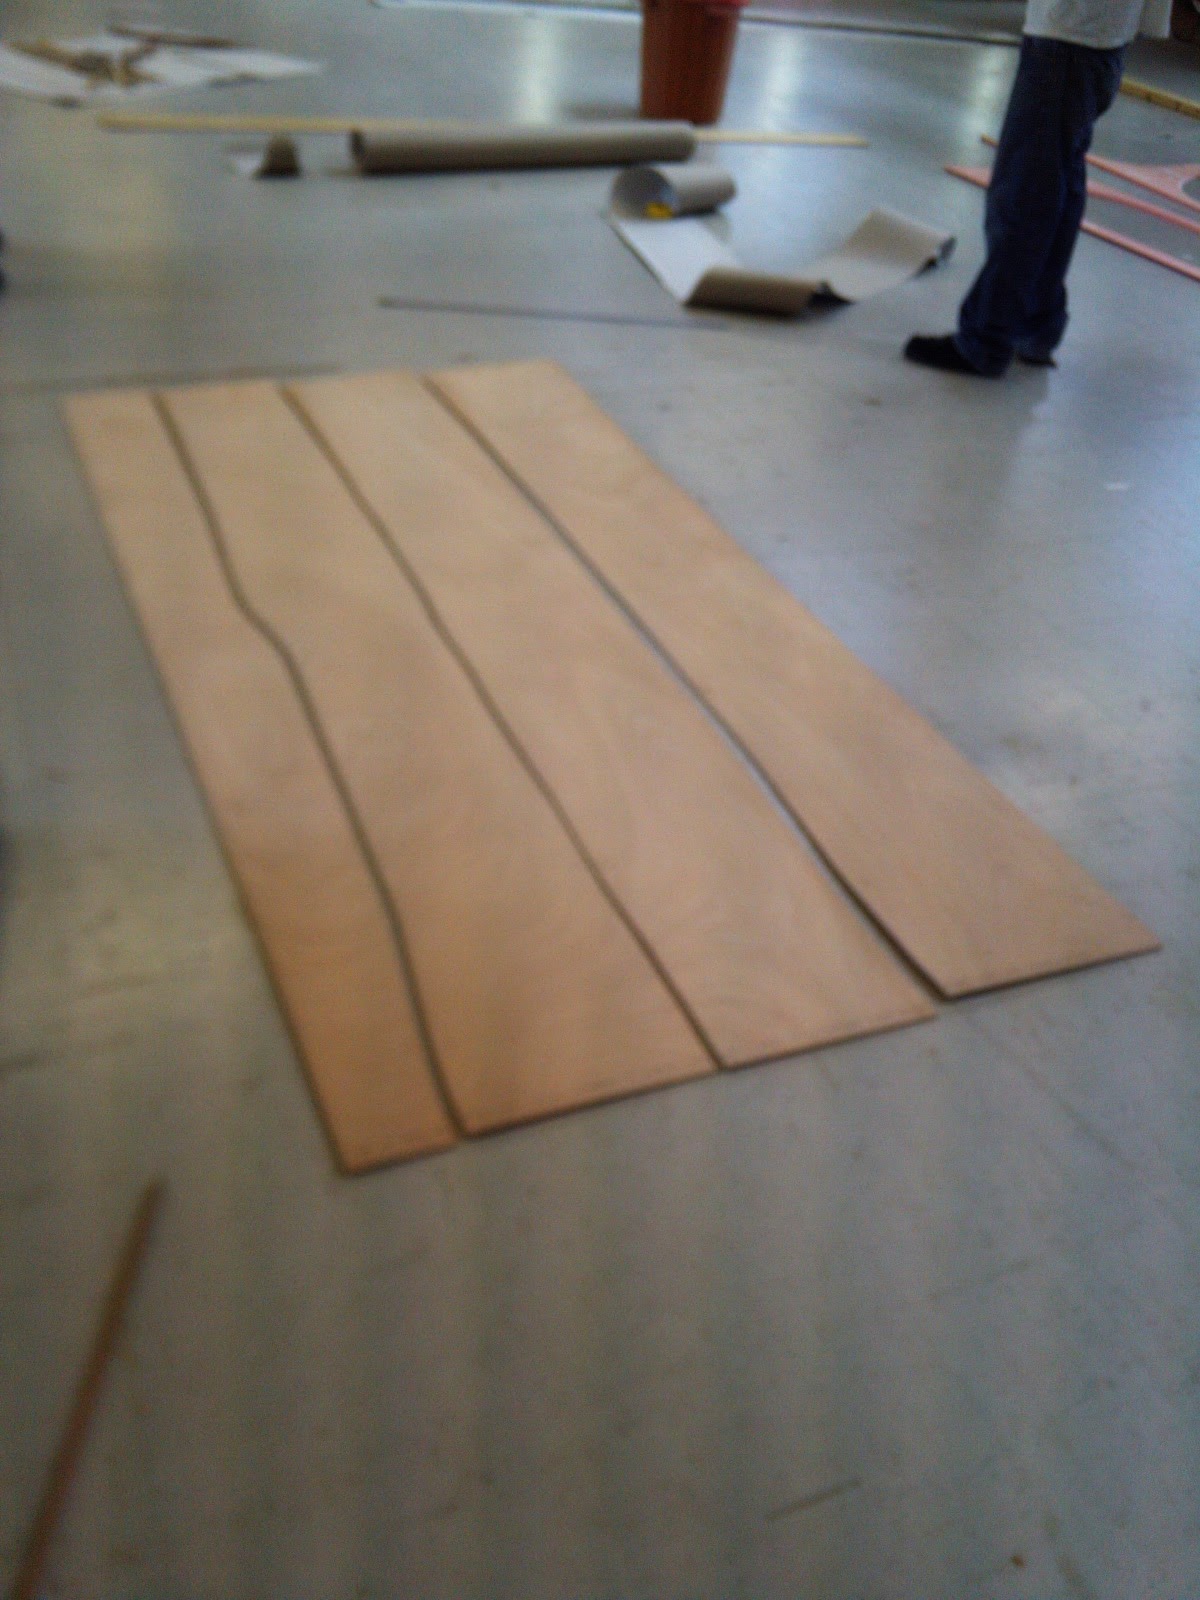
We had these spiling planks that we tacked up against either the garboard or strake topsides (in this case the garboard).  On these planks we can measure up to the bottom and down to the chine line for each station and also make a note of the stem, the transom and midship frames.  we would write down on the plank itself what that distance is and then take that plank over to a piece of cardboard.  Once we have the plank on the card board we can use a straight edge and mark out the distances from each of the stations.  Then we used a fairing batten, in the exact same way we used them for the bottom or for when we first lofted our first boat.  After we got a fair line and have made note of all of the points, transom, stem and midship frames, we cut out the cardboard and transfer it to the sheet of ply.  Once again the plywood is shorter than the length that we need and so we must again scarf the boards together.  When we cut out the boards we chose to put the garboard scarfs aft and the strake scarfs forward so all of the pressure is not all all for scarfs at the same time.  Additionally we made sure that when it came time for gluing the scarfs up that the joint, if it broke, would break into the boat.  We saved the off cut of wood from this ply and used it for other jobs.

Getting the Correct Bevel on the Bottom

We used a hand saw to cut into the bottom until the saw would lay flat on the garboard plank part of the frame.  Then we were able to take a plane and plane back the bottom to a feather edge.  There were so instances where there would have been some degree of overbeveling but if we focused on what we were doing we were able to get the angle right. 


Attaching the Bottom, Stem and Transom


It is very important to remember that when these steps are being that the bottom of the boat is level.  We had to on numerous occasions get out the level and lay it across the transom to check and recheck that it was still level with the rest of the boat.  Once we got the transom level, we put this long piece of lead on top of to keep pressure on the new joint, this way we did not have to put in any screws that would not be staying.  Also, When we pulled the bow of the boat down to join stem there was a lot of force trying to spring back, so we had to put about every cramp that we could find on the stem in order to keep it down in addition to screwing the stem horn into the stock.  Lastly, once we attached the transom and then the stem we noticed that the bottom was slightly port of the centerline, but we already had all of our cramps in place on the stem.  Vaughn showed us how to attach another cramp sideways across the stem and force the bottom and the stem back inline. 


Midship Laminated Frames

Stem

While part of the group was working on the bottom plank we had a member working on getting the stem cut and planed to size.  On the plans we had all of the stem section details and so it was just a matter of transferring the correct information over to the laminated stem.  The tool of choice is a sliding bevel and plane.

Monday, November 8, 2010

Setting the Frames in the Jig


These are the glued pieces set in their respective jigs after the cramps have been put on.  When we were put the pieces in and began tightening the cramps we found that the pieces wanted to slide up or that they werent perfectly even on either side despite being dressed the same.  We took another piece of wood and as one person would began to tighten down the cramp the other person would firmly press down on the laminated pieces near the cramped area and force the pieces back down how we wanted.  If the pieces are really being stubborn you can hammer them down instead of trying to just force them down.  It is also vital that you don't get any of the plastic stuck up in between the pieces of wood because that wont allow for a solid seal.  Then last thing that also happened to us was the laminated pieces getting crease marks under intense pressure despite being steamed.  We decided to just make enough pieces that we could afford to have one extra piece crack or ding.  We did not apply any glue to this piece.  In the second photo you can also see how we used each frame to brace the other frames by setting a straight piece as opposed to angle bracing each individual frame. make sure that these braces do no get in the way of future work. 

Applying Glue Technique

There is a specific way to apply epoxy to ensure that you don't make a mess out of your product but also that you don't spread glue all over the entire shop.  This video is myself and Clovegro applying glue to the laminated frames in the proper way.  Notice how I stack the pieces are stacked and from where I am taking glue, not from the container it was mixed in.

Jig for Laminated Frames and Stem

Our boat has laminated midship pieces and a laminated stem.  In order to get the shape exactly as we need we had to build a jig for it.  We printed off the full scale size stem and taped it down to a piece of particle board.  Then we screwed jig blocks into place (when we did this we made sure that the forward/outside face of the stem/midship frames exceeded the needed dimensions).  Then we used plastic and tape to make sure that the pieces of wood would not stick to the jig.  One thing that we found was that the pieces of wood would not bend around the jig as needed, so a trick that we used was to steam the wood and then bend it into place.  After the wood had been steamed we could bend it easier and not crack or break it  


If Cramps Don't Fit...

One of our problems that we had when trying to keep pressure on the new scarf is that the cramps dont fit with the shape of the table compared to the boat.  This video shows a simple solution and the importance of location when you start to build your boat.

Wood Epoxy Saturation Technique

 When gluing it is important to always saturate the wood, namely end grain, with glue.  This is because the wood will soak up the glue which can/will cause the joint to split apart.  This is done by applying resin to the end grain and then waiting 5 to 10 mins until the wood has soaked it in, then you can make more resin, this time adding the fixatrope, and then sealing the joint.  This video quickly demonstrates the first part of this process.

Cutting, Scarfing, Gluing, Sanding

The boat that we are building is 3.5 meters and the standards length that ply comes in is 2.4 x 1.2 so in order to get the desired length we must joing together sheets of ply, this is best done by scarfing. This is when you plane both sides back a certain distance (in our case we used a 1:10 ratio) and then flip it over and fit the joint with epoxy. When we planed our joint we drew lines set and tried our best to plan to a 'feather edge' and not cross the line. This can be extremely tricky if you are not very careful. We laid the bow piece over the rest because it is the smaller piece and then cramped them both down, this makes the job twice as fast in half the time. If you look closely you can see that there is another piece of particle board on top of the bench that we are working on. This is because the bench does not have a sharp edge and if we were to work on it we could either damage the bench or chip off pieces of the ply that we are working with. The bench also has a removable center piece so when you need to cramp down both sides of your work you can. In the second photo you can see the top piece is nearly down and the bottom piece is not quite there. I took this photo before we finished it so that I could explain how you can tell if your joint is flush without hollows or bumps. You can see the straight lines that result from the different layers of ply being cut evenly across on the top and then on the bottom you can see the line wavers. The bottom board has a bump that still needs to be taken out. Looking at the next photo you can see how the joint is going to fit together. When we planed the joint we tried as hard as possible to get right up to that line and also not to chip off the feather edge but sometimes errors happen and you can see why it is important to be extra careful, because if there are imperfections like bumps, hollow, chips or over planing then the joint won't fit right. Another thing that you should have that is not apparent on these photos is straight lines that you can line up to put the boards back together. An easy way to do this is when you are dry fitting. Simply use your cutout to check for size and then draw straight lines on the ply to ensure that when you put them back together you wont mess up. When you remove the chance for error or decrease your need to think about every little step, that is good. Clovegro always says, "When you plan you become 10% quicker!" The boat that we are building is 3.5 meters and the standards length that ply comes in is 2.4 x 1.2 so in order to get the desired length we must joing together sheets of ply, this is best done by scarfing. This is when you plane both sides back a certain distance (in our case we used a 1:10 ratio) and then flip it over and fit the joint with epoxy. When we planed our joint we drew lines set and tried our best to plan to a 'feather edge' and not cross the line. This can be extremely tricky if you are not very careful. We laid the bow piece over the rest because it is the smaller piece and then cramped them both down, this makes the job twice as fast in half the time. If you look closely you can see that there is another piece of particle board on top of the bench that we are working on. This is because the bench does not have a sharp edge and if we were to work on it we could either damage the bench or chip off pieces of the ply that we are working with. The bench also has a removable center piece so when you need to cramp down both sides of your work you can. In the second photo you can see the top piece is nearly down and the bottom piece is not quite there. I took this photo before we finished it so that I could explain how you can tell if your joint is flush without hollows or bumps. You can see the straight lines that result from the different layers of ply being cut evenly across on the top and then on the bottom you can see the line wavers. The bottom board has a bump that still needs to be taken out. Looking at the next photo you can see how the joint is going to fit together. When we planed the joint we tried as hard as possible to get right up to that line and also not to chip off the feather edge but sometimes errors happen and you can see why it is important to be extra careful, because if there are imperfections like bumps, hollow, chips or over planing then the joint won't fit right. Another thing that you should have that is not apparent on these photos is straight lines that you can line up to put the boards back together. An easy way to do this is when you are dry fitting. Simply use your cutout to check for size and then draw straight lines on the ply to ensure that when you put them back together you wont mess up. When you remove the chance for error or decrease your need to think about every little step, that is good. Clovegro always says, "When you plan you become 10% quicker!"  During the gluing stage we learned that you need to saturated end grain because the wood will soak up glue and pull it away from the joint, which can cause the scarf to split apart.  I will discuss that more later with a video.  After the glue is allowed to dry then you can lightly plane and sand the joint flat, being careful not to sand through the layers of glue that was applied to make the ply itself. 

Sunday, November 7, 2010

Beveling the Bottom of the Frames

We need to prebevel the frames before we put the bottom ply onto the frames.  This is important because there needs to be a tight fit.  This video demonstrates how this can be easily done.

Fairing the Bottom

So when we started to think about attaching the bottom we went back to the autoCAD drawing and pulled the dimensions for the stations.  Then we went to a piece of posterboard and perfectly faired on the deckline  Here Dion uses a Spruce batten to fair in the lines.  The easiest way for me to check if the lines are fair is to get down low to the ground and look down the length of the batten.  Then we cut out the pattern and take it over to the ply for the bottom.  

Making and Setting the Frames


If the boat that we are building didnt come with exact frame sizes we would need to loft the whole thing out and then get the frame sizes for all the stations from the body plan.  Luckily, in clovegro's infinite wisdom, he gave us the exact sizes of the frames in the autoCAD drawing.  We had to go through and draw them on to sheets of woods, in our case we found old sheets of particle board that is used to prevent dings and scraps from getting onto good sheets of ply when it is bundled and shipped - free wood = good wood.  To be the most economical and to use as much as the sheet as possible we had to attach a small bit onto the edge in order to fit the entire frame, this can just be screwed or attached as needed because this is not part of the final boat.  Marking out the frames needs to be perfectly precise because this is what will cause the boat to be fair or unfair because the sheets of ply that will form the final product will wrap tight around these frames.  Once all the frames are drawn and cut they can be put into place.  the station 0 and station 5 needed angled braces but the rest can just be braced off of each other.  We attached our angled braces too high on station five and so later on in the build we came across problems when setting the transom and, in turn, attaching the garboard planks, this is where building knowledge comes into play.  We had to remove and reattach braces in our boat, but now I won't forget this for next time. 

Buidling the Stock or Ladder

In order to begin the build we must first construct a stock that we will be building the frames and boat on.  This is an incredibly important stage because if we set the stock height to low or high it will become considerably harder on us to build at a comfortable height, aka, planing or sanding above our heads or trying to get under a boat that is 1 foot off of the ground.  It is also vital that the stock is level fore and aft and port to starboard because otherwise the boat will be built on an angle and will make it considerably harder on ourselves to do anything correctly.  There also needs to be a centerline on this jig that we can line the stations and frames up to as a reference point.  These points are indicated on the photo:

Beginning of the 'Hory Dory'

We have started are build of the 3.5 meter dory that we are building as the main project of the semester.  This boat was designed by Christopher John Scott Lovegrove, who also is one of the tutors at this school.  We have 6 weeks, 3 days per, to complete this project.  It will be challenging because no one on our team has ever built a boat before. 

We were able to choose are team from the members of the class which is good because we already know each other well and we know the strengths and weaknesses of the team.  A good team consists of many attributes, communication, hardwork, and knowledge being the biggest three.  Communication:  we must be able to understand what the other person is thinking and discuss parts of the build to arrive at the best possible solution.  Hardwork: if people are lazy and/or don't show up to class then the boat will not be completed on time.  This is costly for both the rest of the team and for the future because it can mean that the costs of the finished craft increase.  Knowledge:  we must understand how to build the craft.  We have a set of plans and access to the autoCAD drawing but we must understand the steps needed to effectively build and not waste time.